Ah, the dreaded skipping bike chain. If you’re like me, there’s nothing more frustrating than trying to enjoy a smooth ride, only to have your chain skip just as you’re about to conquer that hill or make a quick sprint. I’ve been there, and let me tell you—it’s annoying! But the good news? It’s fixable. So, before I head out to dinner, let me walk you through how to fix that pesky skipping bike chain.
Why Does a Bike Chain Skip?
First things first, let’s talk about why your chain might be skipping. When I first encountered this problem, I had no clue what was going on. My bike was making weird noises, and every time I put some power into the pedals, the chain would jump, almost like it was taunting me. After doing a bit of research (and a lot of trial and error), I realized that a skipping chain usually boils down to a few common issues:
- Worn-Out Chain: Over time, your chain stretches and wears out, causing it to skip over the teeth of the cassette or chainrings.
- Worn Cassette or Chainrings: Just like the chain, the cassette, and chainrings wear down with use, which can lead to skipping.
- Poor Gear Adjustment: If your derailleur isn’t properly adjusted, it might not align the chain correctly with the gears, leading to skipping.
- Dirty or Lubricant-Starved Chain: Dirt, grime, or a lack of lubrication can cause the chain to stick and skip.
So now that we know what might be causing the problem, let’s dive into how to fix it. Trust me, it’s easier than you think!
What You’ll Need
Before we get into the nitty-gritty, let me quickly list out what you’ll need. I’ll keep it short because I don’t want to keep you from fixing your bike:
- Bike Chain Checker: This tool helps you determine if your chain is worn out.
- Chain Breaker Tool: For removing and replacing the chain.
- New Chain (if needed): In case your old one is too worn out.
- Cassette Lockring Tool: For removing the cassette.
- New Cassette (if needed): If the old one is worn.
- Derailleur Adjustment Tools: Usually a screwdriver or Allen wrench.
- Chain Lubricant: For keeping your chain running smoothly.
- Clean Rags: For wiping down components.
- Degreaser (Optional): To clean the chain and cassette.
Got everything? Great! Let’s get that chain back in working order.
Step 1: Inspect the Chain
The first thing I always do is inspect the chain. You know when I come to my bike, I like to take a moment to look at it—almost like we’re having a conversation. Grab your chain checker tool and insert it into the links of the chain. If the tool indicates that your chain is stretched beyond 0.5% (for 11 and 12-speed chains) or 0.75% (for 9 and 10-speed chains), it’s time for a new chain.
Step 2: Inspect the Cassette and Chainrings
Next, let’s take a look at the cassette and chainrings. If I’m going to replace the chain, I want to make sure the rest of the drivetrain is in good shape too. Spin the pedals and watch how the chain interacts with the cassette. If you notice the chain skipping over certain cogs, those cogs might be worn out.
Take a close look at the teeth on the cassette and chainrings. If they’re sharp, hooked, or unevenly worn, they’re probably past their prime. It’s like when I go to dinner and the food just doesn’t taste right—you know something’s off.
Step 3: Replace the Chain (if needed)
If you’ve determined that your chain is worn out, it’s time to replace it. Use your chain breaker tool to remove the old chain. I like to lay the old chain out next to the new one to ensure I’m cutting the new chain to the correct length. Once you’ve sized it correctly, use the chain breaker tool to connect the links of the new chain.
Step 4: Replace the Cassette (if needed)
If your cassette is worn out, you’ll need to replace it as well. Remove the rear wheel and use the cassette lockring tool to unscrew the lockring. Once the lockring is off, you can slide the old cassette off the free. Slide the new cassette onto the freehub, making sure it’s aligned correctly, and screw the lockring back on.
I always give the new cassette a spin by hand before putting the wheel back on, just to make sure everything’s seated properly. It’s like testing out a new recipe before serving it at dinner—you want to make sure it’s perfect.
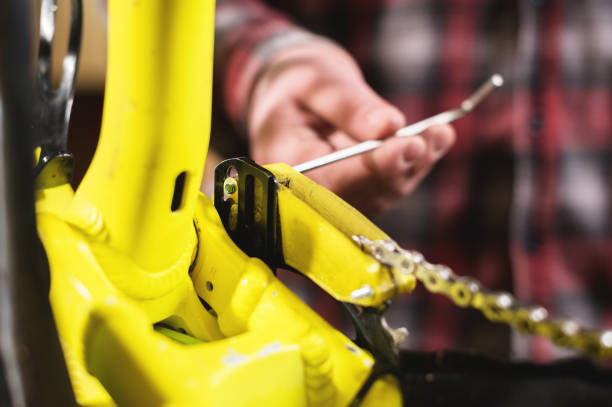
Step 5: Adjust the Derailleur
Now, let’s move on to adjusting the derailleur. This is crucial because even if your chain and cassette are in perfect condition, a poorly adjusted derailleur can still cause skipping.
Start by shifting the chain to the smallest cog on the cassette. Use the barrel adjuster on the derailleur to fine-tune the tension on the cable. If the chain is struggling to move to the next cog, turn the barrel adjuster counterclockwise to add tension. If it’s overshooting, turn it clockwise to reduce tension.
Take your time here. I usually take a few minutes to go through each gear, making small adjustments as needed. It’s like seasoning a dish—you want to get it just right.
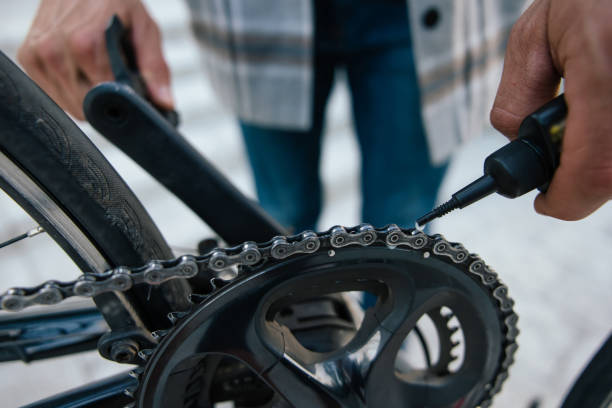
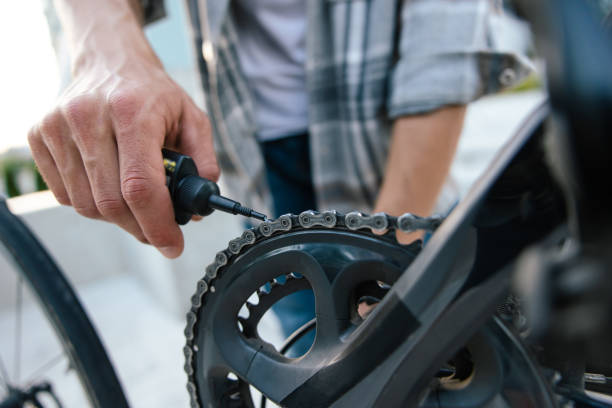
Step 6: Clean and Lubricate the Chain
With everything back in place, let’s give the chain some love. If the chain is dirty, use a degreaser to clean it thoroughly. Once it’s clean and dry, apply a light coat of chain lubricant. I like to hold a rag underneath the chain while applying the lube, to catch any excess.
Spin the pedals backward to work the lube into the chain links, then use a clean rag to wipe off any excess. A well-lubricated chain should move smoothly and quietly, just like when I go this side and things start flowing effortlessly.
Step 7: Test Ride and Fine-Tune
Alright, we’re almost there! Put the bike on the ground and take it for a test ride. Pay attention to how the chain moves through the gears. If you still notice any skipping, you might need to make some final adjustments to the derailleur. Sometimes it’s just a matter of fine-tuning, and sometimes you need to revisit one of the earlier steps.
I usually take my bike around the block a few times, shifting through all the gears and putting some power into the pedals. When everything feels smooth, I know the job is done. And just like that, I’m ready to go to dinner with the satisfaction of knowing my bike is in top shape.
Extra Tips for Keeping Your Chain Happy
Before I sign off, let me share a few extra tips to keep your chain from skipping in the future:
- Regular Maintenance: Keep your chain clean and lubricated. I like to clean my chain every few weeks, depending on how much I’m riding.
- Check Chain Wear: Invest in a chain checker tool and use it regularly. Replacing the chain before it’s too worn can save your cassette and chainrings.
- Inspect Your Drivetrain: Every few months, take a close look at your cassette and chainrings for signs of wear.
- Adjust Your Gears: Keep an eye on your derailleur alignment and make adjustments as needed.
Wrapping Up
And there you have it—a complete guide on how to fix a skipping bike chain. It might seem like a lot of steps, but trust me, once you get into the habit, it’s not so bad. Plus, there’s nothing like the feeling of a smooth, responsive drivetrain when you’re out on the road.
So next time your chain starts skipping, you’ll know exactly what to do. And as I head off to dinner, I’m feeling pretty good knowing that my bike is ready for whatever adventure comes next. Happy riding, and don’t forget to enjoy the process—it’s all part of the biking experience!


