
You know that feeling when you’re out for a peaceful ride, enjoying the scenery, and all you can hear is the annoying squeak of your bike chain? Yeah, me too. It’s like having a tiny mouse hitching a ride and complaining the whole way. Well, fear not, fellow cyclists! I’ve been there, done that, and now I’m here to share my hard-earned wisdom on how to fix those pesky chain noise issues.
Before we dive in, let me tell you a quick story. Last summer, I was gearing up for a big charity ride. I’d been training for months, and my trusty bike had been through thick and thin with me. But as the big day approached, my chain started making more noise than a heavy metal concert. Talk about embarrassing! I couldn’t show up to the event sounding like I was riding a rusty tin can. So, I rolled up my sleeves and got to work. The techniques I’m about to share saved my ride (and my dignity), and I hope they’ll do the same for you.
Acknowledging the Culprits
Before we start fixing, it’s important to understand what might be causing that annoying noise. Chain noise can stem from various issues:
- Dirt and grime buildup
- Lack of lubrication
- Worn-out chain
- Misaligned derailleur
- Stiff chain links
- Loose components
Now that we know what we’re up against, let’s tackle these issues one by one.
Give Your Chain a Bath
First things first, let’s get that chain clean. A dirty chain is often the primary culprit behind those annoying squeaks and creaks.
What you’ll need:
- Degreaser
- An old toothbrush or chain-cleaning tool
- Rags
- Bucket of warm water
Here’s what to do:
a) Shift your bike into the smallest rear cog to make the chain more accessible.
b) Apply degreaser to the chain. I like to use a biodegradable degreaser because, well, we cyclists love nature, right?
c) Use the toothbrush or chain cleaning tool to scrub the chain thoroughly. Get into all those nooks and crannies!
d) Rinse the chain with warm water. You might want to do this outside unless you fancy an impromptu water park in your living room (trust me, I learned this the hard way).
e) Dry the chain with a clean rag.
Pro tip: If your chain is gunked up, you might want to remove it completely for a deep clean. But if you’re like me and the thought of removing your chain makes you break out in a cold sweat, the above method works just fine for regular maintenance.

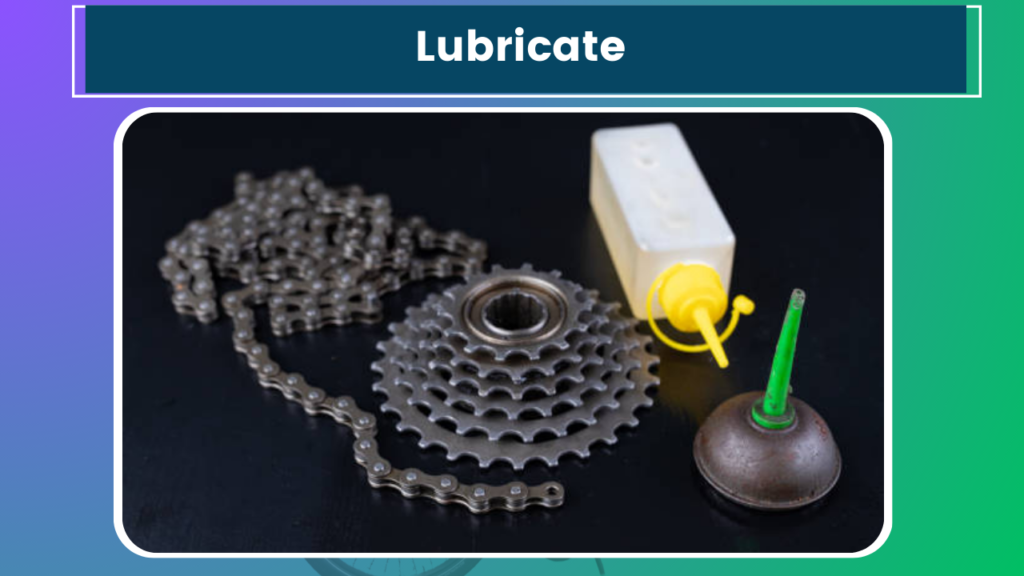
Lubricate Like Your Ride Depends on It (Because It Does)
Once your chain is clean and dry, it’s time to show it some love with some lubrication.
What you’ll need:
- Bike chain lubricant (dry or wet, depending on your riding conditions)
Here’s the process:
a) Apply a small drop of lubricant to each chain link as you slowly backpedal.
b) Continue backpedaling for a minute to help the lube work its way into the chain.
c) Use a clean rag to wipe off any excess lubricant. Too much lube can attract dirt, leading us right back to problem #1.
Remember, when it comes to chain lube, less is more. You’re not dressing a salad here!
Check for Chain Wear
If your chain is worn out, no amount of cleaning and lubing will silence it completely. It’s like trying to make your grandpa’s old sneakers look new – at some point, you just need to replace them.
To check for chain wear, you’ll need a chain wear indicator tool. These are pretty inexpensive and can save you a lot of headaches (and money) in the long run.
If your chain is indeed worn out, it’s time for a replacement. This might seem daunting, but trust me, it’s not as hard as it looks. There are plenty of tutorials online, or you can always take it to your local bike shop if you’re not feeling up to the task.
Align Your Derailleur
A misaligned derailleur can cause all sorts of funky noises. Here’s a quick way to check and adjust it:
a) Shift into the middle gear on your cassette.
b) Look at your derailleur from behind. The jockey wheels should line up perfectly with the gear.
c) If they don’t, use the barrel adjuster on your derailleur to make small adjustments until they’re aligned.
This is one of those things that might take a bit of practice to get right. Don’t be discouraged if it takes a few tries. Rome wasn’t built in a day, and perfect derailleur alignment wasn’t achieved in one either.
Loosen Up Those Stiff Links
Sometimes, a chain can develop stiff links that cause noise when they pass through the derailleur. To fix this:
a) Slowly backpedal and watch for any links that don’t bend smoothly.
b) If you find a stiff link, gently flex it side to side with your hands.
c) If that doesn’t work, try using a chain tool to slightly loosen the pin in the stiff link.
Be careful not to overdo it with the chain tool. We’re going for “loosened,” not “chain confetti.”
Tighten Loose Components
Loose components can cause all sorts of weird noises that you might mistake for chain noise. Do a quick check of these parts:
- Chainring bolts
- Pedals
- Bottom bracket
- Cassette lockring
Tighten any loose components you find. Just remember, when it comes to bike components, “tight” doesn’t mean “tighten with the strength of Thor.” Use a torque wrench if you have one, or just go until it’s snug if you don’t.
Preventing Future Noise Issues
Now that we’ve silenced that squeaky chain, let’s talk about keeping it that way. Here are some tips to prevent future noise issues:
- Regular cleaning: Give your chain a quick wipe-down after every ride, especially if you’ve been riding in wet or muddy conditions. It’s like brushing your teeth – a little bit of regular maintenance goes a long way.
- Lubricate often: How often you need to lube your chain depends on your riding conditions, but a good rule of thumb is every 100-150 miles or whenever your chain starts to sound dry.
- Check your chain wear regularly: Get in the habit of checking your chain wear every month or so. It’s easier (and cheaper) to replace a chain before it wears out your cassette and chainrings.
- Keep an eye on your derailleur alignment: Every few rides, take a quick look at your derailleur alignment. It can get knocked out of whack easier than you might think.
- Address issues promptly: If you start to hear a noise, don’t ignore it. The longer you wait, the worse (and potentially more expensive) the problem can become.
The Joy of a Silent Ride
There’s something magical about a perfectly tuned bike. The smooth whir of the chain, the gentle hum of tires on pavement – it’s like music to a cyclist’s ears. And now, armed with these tips and tricks, you can be the maestro of your two-wheeled symphony.
Remember, practice makes perfect. Don’t get discouraged if your first attempt at chain maintenance doesn’t result in total silence. Keep at it, and soon you’ll be the go-to person in your riding group for fixing chain issues.
As for me, I’m happy to report that my bike ran smoothly and silently for that charity ride last summer. It was so quiet that I managed to sneak up on a few fellow riders and give them a friendly scare. Okay, maybe that wasn’t the most mature thing to do, but hey, I couldn’t resist.
Now, if you’ll excuse me, the sun is shining, and my beautifully silent bike is calling my name. Time to hit the road and enjoy the sweet sound of… well, nothing at all. Happy riding, folks!


