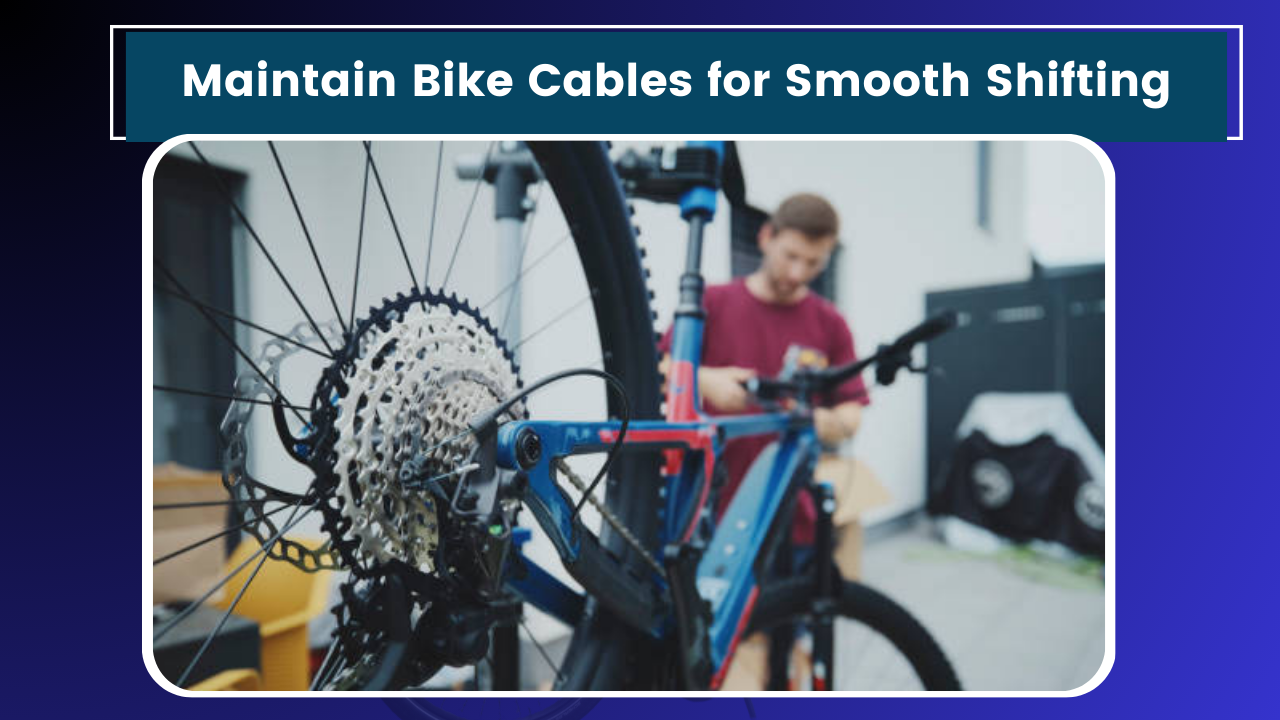
You know how it goes – you’re out for a ride on a beautiful Saturday morning, the sun’s shining, and you’re feeling great. Then suddenly, as you try to shift gears on that hill you always struggle with, your bike decides it’s not in the mood to cooperate. The chain’s skipping, the gears are grinding, and your peaceful ride becomes a frustrating battle with your bike. We’ve all been there, and let me tell you, it’s not fun.
But here’s the thing – some simple cable maintenance can prevent many of those annoying shifting problems. I learned this the hard way after one too many rides ruined by temperamental gears. So, grab a coffee (or your beverage of choice), and let’s dive into bike cable maintenance. Trust me, your future self will thank you when you’re cruising up that hill with buttery smooth shifts.
Why Cable Maintenance Matters
Before we get into the nitty-gritty, let’s talk about why we’re even bothering with this. Bike cables are like the nervous system of your bike’s shifting and braking. They transmit the commands from your shifters and brake levers to where the action happens. When they’re working well, you don’t even think about them. But when they’re not… well, that’s when you end up cursing at your bike in the middle of a trail.
Over time, cables can stretch, fray, or get gunked up with dirt and grime. This leads to poor shifting performance, inconsistent braking, and a generally less enjoyable ride. Regular maintenance keeps everything running smoothly and can even extend the life of your cables and housing. Plus, it’s way cheaper than replacing your entire drivetrain because of worn-out components.
Tools You’ll Need
Alright, before we get our hands dirty, let’s make sure we’ve got everything we need. Don’t worry, you won’t need a fully stocked bike shop – just a few basic tools will do the trick:
- Allen keys (hex wrenches)
- Cable cutters
- Needle-nose pliers
- Screwdrivers (flathead and Phillips)
- Lubricant (dry lube or light oil)
- Clean rags
- Degreaser
- Small brush (an old toothbrush works great)
If you’re anything like me, half of these tools are probably scattered around your garage or wherever you do your tinkering. Take a few minutes to gather everything up – it’ll make the whole process a lot smoother.
Step-by-Step Cable Maintenance
Now that we’re all set with our tools, let’s get down to business. I’m going to walk you through the process step-by-step, just like I wish someone had done for me when I was first figuring this out.
Inspect Your Cables
First things first, we need to see what we’re dealing with. Shift through all your gears and apply the brakes, paying close attention to how they feel. Are the shifts crisp and precise, or do they feel sluggish? Do the brakes engage smoothly, or is there a delay?
Next, take a close look at the cables themselves. Check for any fraying, kinks, or rust. Pay special attention to the areas where the cables enter and exit the housing. These are common spots for wear and tear.
Clean the Cables and Housing
Okay, time to get those cables and housing squeaky clean. Grab your degreaser and that old toothbrush I mentioned earlier.
Start by wiping down the exposed sections of cable with a rag dampened with a degreaser. Then, use the toothbrush to scrub away any built-up grime, especially around the cable ends and where they enter the housing.
For the housing itself, you can use a rag with some degreaser to wipe it down. If it’s really dirty, you might want to consider replacing it entirely – but we’ll get to that later.
Lubricate the Cables
Now that everything’s clean, it’s time to add some lubrication. This is where a lot of people go wrong – too much lube can attract dirt and grime, making your problem worse in the long run.
I like to use a dry lube for this, but a light oil works too. Apply a small amount to a clean rag and run the cables through it. You want them to be lightly coated, not dripping wet.
For the housing, you can add a drop of lube at each end where the cable enters. Shift through all your gears a few times to work the lube through the system.
Adjust Cable Tension
If your shifting still isn’t quite right after cleaning and lubing, you might need to adjust the cable tension. This is where those barrel adjusters on your derailleurs come in handy.
For the rear derailleur, shift into the smallest cog. Then, turn the barrel adjuster counterclockwise until the derailleur starts to move toward the next larger cog. Now, slowly turn it back clockwise until the derailleur is perfectly aligned with the smallest cog.
For the front derailleur, the process is similar. Shift into the smallest chainring, then adjust the barrel until the derailleur cage is just barely touching the chain.
Check for Cable Stretch
New cables tend to stretch a bit when you first install them. If you’ve recently replaced your cables and your shifting has gone out of whack, this might be the culprit.
To fix this, you’ll need to take up the slack in the cable. Loosen the cable pinch bolt on the derailleur, pull the cable tight (but not so tight that it shifts), and retighten the bolt. Then, fine-tune with the barrel adjusters as described above.
Replace if Necessary
Sometimes, despite our best efforts, cables, and housing just need to be replaced. If you’re seeing fraying, kinks that won’t straighten out, or if the housing is cracked or kinked, it’s time for some new gear.
Replacing cables and housing isn’t too difficult, but it can be a bit fiddly. If you’re not comfortable doing it yourself, your local bike shop will be happy to help. Trust me, the difference a fresh set of cables can make is like night and day.
Preventative Maintenance Tips
Now that we’ve gone through the whole process, let’s talk about how to keep your cables in top shape between major maintenance sessions.
- Keep it clean: After rides, especially muddy or wet ones, wipe down your bike, including the cables and housing. This prevents dirt and grime from building up.
- Lube regularly: A light application of lube every few rides can keep things running smoothly. Remember, less is more here.
- Store your bike properly: If possible, keep your bike indoors or at least covered. Exposure to the elements can speed up cable wear.
- Listen to your bike: If shifting starts to feel off, address it early. Small adjustments can prevent bigger problems down the line.
- Schedule regular check-ups: Mark your calendar for a thorough cable check every few months, depending on how often you ride.
Wrapping It Up
Well, there you have it – everything you need to know about maintaining your bike cables for smooth shifting. I know it might seem like a lot at first, but trust me, once you get into the habit, it becomes second nature.
The first time I went through this process, it took me the better part of an afternoon (with plenty of breaks for snacks and head-scratching). Now, I can knock it out in under an hour, and my bike thanks me for it every time I hit the trails.
Remember, a well-maintained bike isn’t just more enjoyable to ride – it’s safer too. Those smooth shifts and reliable brakes could make all the difference when you’re bombing down a hill or navigating tricky terrain.
So, next time you’re thinking about skipping your bike maintenance to catch that new Netflix show (we’ve all been there), remember this article. Your future self, cruising along with buttery smooth shifts, will thank you.
Now, if you’ll excuse me, all this talk about biking has me itching to hit the trails. I think I’ll go give my cables a quick once-over before heading out. Happy riding, and may your shifts always be smooth!


